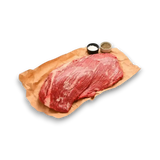
A rump cap roast (picanha) recipe creates a tender, juicy beef roast with a crisp, golden fat cap by combining simple seasoning, controlled roasting, and accurate temperature monitoring. Prepare the roast by trimming only excess fat, scoring the fat cap, seasoning with coarse salt, black pepper, garlic, and olive oil, then roasting at a moderate temperature before finishing over high heat. Cook the roast to your preferred doneness, with 54 to 57°C (129 to 135°F) for medium rare being the most commonly recommended, using a meat thermometer. Rest for 15–20 minutes, and slice against the grain to maximise tenderness and retain the meat's natural juices.
Consistently great results depend on proper preparation, gradual fat rendering, and careful temperature control rather than cooking time alone. The roast can be cooked in the oven, on a BBQ, rotisserie, air fryer, or by reverse searing, and pairs well with potatoes, vegetables, salads, and herb-based sauces. Proper carving, storage, and gentle reheating also help preserve flavour, moisture, and texture, making rump cap (picanha) suitable for both family meals and special occasions.
What Ingredients Do You Need to Make a Rump Cap Roast?
To make a basic rump cap roast, you need a whole rump cap or picanha with its fat cap attached, coarse salt, freshly ground black pepper, garlic, and a small amount of olive oil or neutral cooking oil. The following quantities are suitable for a 1.5 kg rump cap, serving approximately six people.
|
Ingredient |
Quantity |
Purpose |
|
Whole rump cap or picanha |
1 roast (1–1.5 kg) |
Provides the main beef roast |
|
Coarse salt or sea salt |
2 teaspoons |
Seasons the meat and helps dry the fat cap for better browning |
|
Freshly ground black pepper |
1–1½ teaspoons |
Adds mild heat and savoury flavour |
|
Garlic |
3–4 cloves, crushed |
Adds aromatic flavour to the beef |
|
Olive oil or neutral cooking oil |
1 tablespoon |
Helps the garlic and seasoning adhere to the surface |
How Do You Prepare a Rump Cap Roast Before Cooking?

Prepare a rump cap roast by trimming only excess fat, scoring the fat cap, seasoning the meat evenly, and allowing it to come to room temperature before roasting. These steps help the fat render properly, improve seasoning penetration, and promote even cooking for a tender, flavourful roast.
To prepare a rump cap roast before cooking, follow these steps:
-
Trim excess fat if needed: Leave the fat cap intact, but trim it to about 5–10 mm if it is excessively thick. The fat protects the meat during cooking and adds flavour.
-
Score the fat cap: Use a sharp knife to score the fat in a shallow crosshatch pattern without cutting into the meat. This helps the fat render more evenly and creates a crisp, golden crust.
-
Pat the roast dry: Remove surface moisture with paper towel to help the seasoning adhere and encourage better browning.
-
Season generously: Rub the roast with olive oil, then season all sides with coarse sea salt, freshly cracked black pepper, and crushed garlic. For best flavour, season at least 30–60 minutes before cooking.
-
Bring to room temperature: Let the roast sit out for 30–45 minutes before placing it in the oven. This promotes more even cooking from edge to centre.
-
Preheat the oven: Heat the oven to the desired roasting temperature before cooking so the fat begins rendering immediately and the roast cooks consistently.
How Do You Cook a Rump Cap Roast Step by Step?

The most practical and consistent way to cook a rump cap roast is to roast it at a moderate oven temperature before finishing it at high heat. This method promotes even doneness from edge to centre, gives the fat cap enough time to render gradually, reduces the risk of drying the outer meat, and makes the internal temperature easier to control. The final high-heat stage then crisps and caramelises the rendered fat cap. It works well in a standard home oven without requiring specialist BBQ or rotisserie equipment.
-
Step 1: Preheat the Oven
Preheat the oven to 160°C (fan-forced) or 180°C (conventional) before placing the rump cap inside. Allow the oven to reach the correct temperature completely so the roast begins cooking under stable, even heat from the start. A properly preheated oven promotes more consistent cooking and helps the fat cap begin rendering immediately.
Avoid placing the roast into an oven that is still heating. Fluctuating temperatures can delay fat rendering, extend the overall cooking time, and make it more difficult to achieve the desired internal temperature and a crisp, evenly browned fat cap.
-
Step 2: Prepare and Season the Roast
Pat the rump cap thoroughly dry with paper towel, paying particular attention to the fat cap. Score the fat in a shallow crosshatch pattern, spacing the cuts evenly and taking care not to cut into the meat. Shallow scoring increases the exposed surface area, helping the fat render and crisp more evenly.
Rub the roast lightly with olive oil, then season all sides with coarse sea salt, freshly cracked black pepper, and crushed garlic. Work the seasoning across the surface and into the shallow score marks without pressing garlic deeply into the cuts. Let the seasoned roast stand at room temperature for 30–45 minutes before cooking to reduce its surface chill and encourage more even roasting.
-
Step 3: Position the Roast
Place the rump cap on a wire rack set inside a roasting pan, with the fat cap facing upwards. The rack keeps the meat above the base of the pan, allowing hot air to circulate around the roast and preventing the underside from sitting in rendered fat. Keeping the fat cap exposed also allows it to brown while the melting fat naturally bastes the beef.
Position the roasting pan on the middle oven rack, where heat circulation is generally most even. Avoid placing the roast too close to the top element during the moderate-temperature stage, as the fat may brown before it has rendered properly.
-
Step 4: Roast at a Moderate Temperature
Roast the rump cap until its internal temperature reaches approximately 5–8°C below your target doneness. As a general guide, allow around 25–30 minutes per 500 g, although the actual cooking time will depend on the roast’s thickness, shape, starting temperature, and the accuracy of the oven.
Begin checking the temperature before the estimated cooking time has elapsed, especially if the roast is small or relatively thin. Cooking time should be treated only as a planning guide because two roasts of the same weight may cook at different rates when their thicknesses differ.
-
Step 5: Check the Internal Temperature
Insert an instant-read meat thermometer into the thickest part of the lean meat, avoiding the fat cap and any large pockets of fat. Push the probe toward the centre of the roast and check from more than one position if the cut has an uneven shape.
Remove the roast from the moderate-temperature stage when it reaches the following temperatures:
|
Desired Doneness |
Remove Before High-Heat Finish |
Final Temperature After Resting |
|
Rare |
43–45°C |
49–52°C |
|
Medium-rare |
48–50°C |
54–57°C |
|
Medium |
53–55°C |
60–63°C |
|
Medium-well |
58–60°C |
65–68°C |
|
Well done |
65°C+ |
70°C+ |
Medium-rare is the most commonly recommended doneness for rump cap because it preserves the meat’s tenderness and juiciness while allowing the rendered fat to complement the beef. Continue monitoring the temperature during the final high-heat stage, as smaller or thinner roasts may rise more quickly than expected.
-
Step 6: Finish at High Heat
Increase the oven temperature to 220–230°C and return the roast to the oven for 10–15 minutes. Keep the fat cap facing upwards so the exposed surface receives direct heat and develops a crisp, caramelised crust.
Watch the roast closely during this stage. The fat cap should become deep golden brown, lightly blistered, and crisp without turning black. If it browns too quickly, reduce the finishing time or move the pan farther from the upper heating element. Avoid extending the high-heat stage solely to achieve more colour, as this may push the centre beyond the intended doneness.
-
Step 7: Rest the Roast
Transfer the rump cap to a carving board and loosely tent it with aluminium foil. Rest the roast for 15–20 minutes before slicing. Do not wrap it tightly, as trapped steam can soften the crisp fat cap.
During resting, carryover cooking raises the internal temperature by approximately 3–5°C. The resting period also allows the juices to redistribute through the meat instead of flowing out immediately when the roast is carved.
-
Step 8: Slice Across the Grain and Serve
Before slicing, identify the direction of the muscle fibres. Because the grain can change direction across a rump cap, divide the roast into sections when necessary and rotate each section before carving.
Use a long, sharp carving knife to cut across the grain into slices approximately 5–10 mm thick. Cutting perpendicular to the muscle fibres shortens them, making the meat easier to chew and noticeably more tender. Arrange the slices so each portion includes some rendered fat cap, then serve with roast vegetables, potatoes, chimichurri, pepper sauce, or the pan juices.
What Are the Alternative Ways to Cook Rump Cap?
Rump cap can also be cooked on a BBQ or rotisserie, using the reverse-sear method, or in an air fryer. Each method changes the balance of smoke flavour, crust development, fat rendering, cooking control, and the equipment required. While oven roasting remains a practical choice for most home cooks, these alternatives can produce excellent results when matched to your preferred cooking style.

How to Cook Rump Cap on a BBQ
-
Preheat the BBQ for two-zone cooking with one direct-heat zone and one indirect-heat zone.
-
Score the fat cap and season the rump cap with coarse sea salt, black pepper, garlic, and olive oil.
-
Place the roast over indirect heat with the fat cap facing up.
-
Close the lid and cook until the internal temperature is 5–8°C below your target doneness.
-
Move the roast over direct high heat and sear each side, including the fat cap, until browned and crisp.
-
Remove from the BBQ and rest for 15–20 minutes.
-
Slice across the grain and serve.
How to Cook Rump Cap on a Rotisserie
-
Preheat the rotisserie or BBQ to medium heat (around 180°C).
-
Score and season the rump cap.
-
Secure the roast firmly on the rotisserie spit with the fat evenly balanced.
-
Position a drip tray beneath the roast to catch rendered fat.
-
Rotate continuously until the internal temperature reaches 5–8°C below your desired doneness.
-
Increase the heat for the final 10–15 minutes to crisp the fat cap if needed.
-
Rest the roast for 15–20 minutes before slicing across the grain.
How to Reverse Sear Rump Cap
-
Preheat the oven or BBQ to 120–130°C.
-
Season the rump cap and place it on a rack with the fat cap facing up.
-
Cook slowly until the internal temperature is 10°C below your desired final temperature.
-
Remove the roast and allow it to rest for 5–10 minutes.
-
Heat a grill, BBQ, or heavy pan to very high heat.
-
Sear the rump cap on all sides, especially the fat cap, until a deep golden crust forms.
-
Rest for another 10–15 minutes, then slice across the grain.

How to Cook Rump Cap in an Air Fryer
-
Preheat the air fryer to 180°C.
-
Trim excess fat if necessary, score the fat cap, and season the roast.
-
Place the rump cap in the basket with the fat cap facing up.
-
Air fry until the internal temperature is 5–8°C below your target doneness, turning once if required for even cooking.
-
Increase the temperature to 200°C for the final 5–8 minutes to crisp the fat cap.
-
Remove the roast and rest for 10–15 minutes.
-
Slice across the grain and serve.
What Temperature Should a Rump Cap Roast Be Cooked To?
A rump cap roast should be cooked to an internal temperature of 49–52°C (120–126°F) for rare, 54–57°C (129–135°F) for medium-rare, 60–63°C (140–145°F) for medium, and 70°C (158°F) or higher for well-done. Remove the roast from the heat 3–7°C before it reaches your target temperature to allow for carryover cooking during resting. For the most accurate results, measure the temperature in the thickest part of the roast using a reliable meat thermometer rather than relying on cooking time alone.
Refer to the table below for the correct cooking temperatures:
|
Doneness |
Pull Temperature |
Final Serving Temperature |
Centre Appearance |
|
Rare |
43–45°C (109–113°F) |
49–52°C (120–126°F) |
Warm red centre |
|
Medium-rare |
48–50°C (118–122°F) |
54–57°C (129–135°F) |
Warm red-pink centre |
|
Medium |
53–55°C (127–131°F) |
60–63°C (140–145°F) |
Warm pink centre |
|
Medium-well |
58–60°C (136–140°F) |
65–68°C (149–154°F) |
Slightly pink centre |
|
Well-done |
65°C (149°F) |
70°C+ (158°F+) |
Little or no pink |
Rare Rump Cap
Rare rump cap is served at a final internal temperature of 49–52°C (120–126°F) and is removed from the oven or BBQ at 43–45°C (109–113°F) to allow for carryover cooking during resting. At this doneness, the centre remains red and warm, with a soft, tender texture and less rendered internal fat than higher levels of doneness. The exact pull temperature depends on the cooking method, the intensity of the finishing heat, and the expected temperature rise while resting. If serving individuals at increased risk of foodborne illness, refer to official Australian food-safety guidance before choosing rare beef.
Medium-Rare Rump Cap
Medium-rare rump cap reaches a final internal temperature of 54–57°C (129–135°F) and should generally be removed from the heat at 48–50°C (118–122°F). This level of doneness is a common choice because it retains good moisture while allowing more fat to render than rare. The centre should appear warm red-pink, with a tender texture and noticeable juice retention. Measure the temperature in the thickest part of the roast, and allow for approximately 3–5°C of carryover cooking during the resting period before carving.
Medium Rump Cap
Medium rump cap is finished at a final internal temperature of 60–63°C (140–145°F) after being removed from the heat at approximately 53–55°C (127–131°F). The centre should be pink throughout, with a firmer texture than medium-rare while remaining moist when cooked correctly. Always remove the roast before it reaches the target serving temperature because carryover cooking continues during resting and helps bring the meat to its final doneness without overcooking.
Well-Done Rump Cap
Well-done rump cap is served at a final internal temperature of 70°C (158°F) or higher and is generally removed from the heat at around 65°C (149°F). At this doneness, the meat is fully cooked through with little or no pink and has a firmer texture. Because the lean portion of the rump cap can dry out before the fat cap has fully rendered, cook the roast at a moderate temperature and monitor the internal temperature closely with a meat thermometer. This approach helps minimise moisture loss while still achieving a well-done finish.
How Do You Get a Crispy Fat Cap?
To get a crispy fat cap, keep the surface dry, score the fat correctly, season it early, render the fat gradually, finish with high heat, and prevent steam from softening the crust during resting. Each step improves fat rendering and browning while helping avoid common mistakes that can leave the fat chewy instead of crisp.
Follow these best practices for a crispy fat cap:
-
Keep the surface dry: Before seasoning, pat the fat cap thoroughly with paper towel until no visible moisture remains. A dry surface encourages better browning and crisping, whereas excess moisture causes the fat to steam.
-
Score the fat cap shallowly: Lightly score the fat in a crosshatch pattern, cutting only through the fat layer. This improves fat rendering and creates a crisp, textured finish without releasing the meat's juices.
-
Maintain the right fat-cap thickness: Aim to keep 5–10 mm of fat across the roast. An even layer melts gradually, bastes the beef as it cooks, and produces more consistent browning.
-
Season the fat early: For the best results, sprinkle coarse sea salt over the fat cap 30–60 minutes before cooking. This gives the surface time to dry slightly, helping the fat caramelise more effectively.
-
Keep the fat cap facing upwards: Roast the rump cap with the fat layer on top so the rendered fat naturally coats the meat while the exposed surface develops an even golden crust.
-
Render the fat slowly first: Start cooking at a moderate oven temperature to allow the fat beneath the surface to melt gradually. Once rendered, it crisps far more effectively during the final high-heat stage.
-
Finish with strong direct heat: Complete the cook by increasing the oven to 220–230°C, or place the roast under a grill (broiler) or over direct BBQ heat for the final 5–15 minutes to crisp the rendered fat.
-
Control the grill distance: Keep the fat cap approximately 10–15 cm below the grill element. This distance provides intense radiant heat while reducing the risk of burning the surface.
-
Watch for browning cues: Rather than relying only on time, look for a deep golden-brown, blistered, and lightly crackled fat cap, which indicates the surface has rendered and crisped properly.
-
Manage BBQ flare-ups: When flames develop from dripping fat, briefly move the roast to indirect heat until they subside. This prevents scorching while maintaining steady rendering.
-
Rest without trapping steam: Loosely tent the roast with foil after cooking instead of sealing it tightly. Allowing steam to escape helps preserve the crisp texture of the fat cap throughout the resting period.

What Are the Best Tips for Cooking Rump Cap Roast?
The best tips for cooking a rump cap roast are to use a meat thermometer, cook to internal temperature rather than time, keep most of the fat cap attached, avoid overcooking, rest the meat before carving, and slice against the grain. Together, these techniques improve temperature accuracy, preserve moisture, enhance fat rendering, and produce a tender, flavourful roast with a crisp fat cap.
The tips below help produce a tender, juicy rump cap roast:
-
Use a meat thermometer: Insert a reliable meat thermometer into the thickest part of the roast to check doneness accurately. Guessing by colour or cooking time alone often leads to undercooked or overcooked beef.
-
Cook to temperature rather than time alone: Treat cooking times as a guide and remove the roast when it reaches the recommended pull temperature. Roast size, thickness, oven performance, and starting temperature all affect cooking time.
-
Keep most of the fat cap attached: Leave a 5–10 mm layer of fat intact to protect the meat during roasting and allow it to baste naturally as it renders. Removing too much fat reduces flavour and moisture.
-
Avoid overcooking the beef: Remove the roast a few degrees before your target serving temperature to allow for carryover cooking during resting. Leaving it on the heat until the final temperature is reached can dry out the lean meat.
-
Rest the meat before carving: Rest the roast loosely tented with foil for 10–20 minutes before slicing. This allows the juices to redistribute throughout the meat while helping preserve the crisp fat cap.
-
Slice against the grain: Identify the direction of the muscle fibres and carve across them using a sharp knife. Shortening the muscle fibres produces noticeably more tender slices and improves the eating experience.
How Do You Slice a Rump Cap Roast?
To slice a rump cap roast, rest the meat for 15–20 minutes, identify the grain, divide the roast where the grain changes, use a sharp carving knife, slice across the grain into 5–10 mm slices, and serve each portion with some fat cap attached. These steps maximise tenderness, maintain an even texture, and ensure every slice retains flavour and moisture.
Follow these steps to slice a rump cap roast correctly:
-
Let the rump cap rest for 15–20 minutes so the juices redistribute before slicing.
-
Locate the direction of the muscle fibres before carving, either on the raw or rested roast.
-
Separate the roast where the grain changes direction so each section can be sliced correctly.
-
Carve with a long, sharp knife to produce clean, even slices without tearing the meat.
-
Cut perpendicular to the muscle fibres to maximise tenderness.
-
Cut slices about 5–10 mm thick for consistent texture and presentation.
-
Arrange slices so each serving includes some rendered fat cap for balanced flavour and texture.
What Do You Serve With Rump Cap Roast?

Rump cap roast pairs best with potato and starch sides, roasted vegetables, fresh salads, herb-based sauces, and creamy or tangy condiments. These accompaniments balance the richness of the beef and rendered fat cap while adding freshness, texture, or extra flavour.
Potato and Starch Sides
-
Roast potatoes: Crisp roast potatoes complement the crispy fat cap and absorb the beef juices.
-
Mashed potatoes: Creamy mashed potatoes provide a smooth contrast to the roast's firm texture.
Vegetables and Salads
-
Roasted vegetables: Roasted carrots, pumpkin, onions, or asparagus add natural sweetness that balances the savoury beef.
-
Green salad: A fresh green salad with a light vinaigrette cuts through the richness and adds freshness.
Sauces and Condiments
-
Chimichurri: A herb and garlic sauce that adds bright, tangy flavour and complements grilled or roasted beef.
-
Salsa verde: Fresh herbs, capers, and olive oil create a vibrant sauce that balances the rendered fat.
-
Horseradish cream: A creamy, mildly spicy condiment that enhances the beef's flavour without overpowering it.
How Do You Store and Reheat Leftover Rump Cap Roast?

Leftover rump cap roast should be cooled promptly, stored in an airtight container in the refrigerator or freezer, and reheated gently only when needed. Cooling the meat quickly and minimising the time it spends between 5°C and 60°C helps reduce bacterial growth. For the best quality, store larger pieces separately from sliced portions, as slices reheat faster but dry out more easily. Reheat only the amount you plan to eat and avoid repeated reheating.
Storage
-
Cool promptly: Refrigerate the cooked rump cap within 2 hours of cooking, following Australia's 2-hour/4-hour food safety rule.
-
Portion before storing: Divide large roasts into smaller portions so they cool more quickly and evenly.
-
Use airtight containers: Store the beef in a sealed container or wrap it tightly to minimise moisture loss and prevent cross-contamination.
-
Refrigerate or freeze: Keep leftovers at 5°C or below, or freeze in airtight packaging for longer storage.
Reheating
-
Use gentle heat: Reheat larger pieces in a low oven (120–150°C) to help retain moisture.
-
Add a little moisture: Use a splash of beef stock, pan juices, or water to reduce drying.
-
Cover loosely: Cover with foil or a lid to retain moisture while reheating.
-
Reheat sliced beef carefully: Slices warm faster than whole pieces but also lose moisture more quickly.
-
Use the microwave for convenience: Reheat on 50–70% power in short intervals, turning the meat between bursts.
-
Check the temperature: Heat the beef thoroughly and use a food thermometer where possible.
-
Avoid repeated reheating: Reheat only the portion you intend to eat to maintain both quality and food safety.
How Long Does Cooked Rump Cap Last in the Fridge?
Cooked rump cap roast can be stored in the refrigerator for 3–4 days, provided it is cooled promptly, placed in a sealed container, and kept at 5°C or below. Refrigerate the beef within 2 hours of cooking to minimise bacterial growth. Do not rely on smell, colour, or appearance alone to determine whether leftovers are safe, as harmful bacteria may be present without obvious signs of spoilage. If you will not use the beef within a few days, freeze it instead for longer storage.
How Do You Reheat Rump Cap Without Drying It Out?
The best way to reheat rump cap without drying it out is to use low, gentle heat and add a small amount of moisture. For larger portions, place the beef in a baking dish with a little beef stock or pan juices, cover loosely with foil, and warm in a 120–150°C oven until heated through. For sliced beef, use a covered frying pan over low heat with a splash of stock or water to retain moisture. If using a microwave, reheat at reduced power (50–70%) in short intervals, turning the meat between bursts for even heating. Avoid reheating until the beef becomes tough, and reheat only once where possible. If hot-holding after reheating, ensure the beef reaches at least 60°C.
How Much Does a Rump Cap Cost in Australia?
Rump cap costs AUD $22–$45+ per kilogram in Australia, although the exact price depends on the retailer, beef grade, origin, ageing method, roast size, and whether it is sold as rump cap or picanha. Supermarkets generally offer the most affordable options at around $24/kg, while independent butchers commonly charge $30–$48/kg for higher-quality cuts.
Premium butchers and online meat retailers often sell grass-fed, grain-fed, Wagyu, or dry-aged rump cap for $26–$58/kg. Based on these prices, a whole 1.2–2.0 kg roast costs between $30 and $120, depending on its weight and quality. Prices vary between retailers and regions and may change with seasonal supply, promotions, and market conditions, so comparing current prices before purchasing is recommended.
Where Can You Buy Rump Cap ( Picanha )Online in Australia?
You can buy rump cap (picanha) online from specialist online butchers, premium meat retailers, farm-direct suppliers, and gourmet food stores throughout Australia. Most retailers offer whole roasts and steak-cut picanha in grass-fed, grain-fed, Angus, and Wagyu options with refrigerated home delivery. Before you buy rump cap (picanha), compare the price per kilogram, beef grade, marbling, roast size, ageing method, delivery costs, and whether the cut is labelled as rump cap or picanha. Reviewing these details helps you choose the best quality and value for your preferred cooking method.